Recipe: Peppermint Brownies

Peppermint Brownies

This post contains my Amazon Associates link.

I was in the mood for brownies last week, so I decided to make a batch using Paula Deen’s Creme De Menthe Brownies recipe. I discovered this recipe a few years back and it results in the best brownies I’ve ever made, so it’s a winner! My version adapts and replaces several of the ingredients to what I have on hand, and resulted in perfect, soft, peppermint brownies. Yum.

Peppermint Brownies

Peppermint Brownies

Ingredients

  • 1 1/4 cups all-purpose flour
  • 3/4 cup Hershey's Cocoa
  • 2 cups sugar
  • 1/2 tsp. cinnamon
  • 1/2 tsp. baking powder
  • 4 eggs
  • 1 tsp. Nielsen-Massey Madagascar Bourbon Pure Vanilla Extract
  • 2. tsp. Nielsen-Massey Pure Peppermint Extract
  • 1 cup Country Crock margarine

Instructions

  • Combine all ingredients in a large bowl and mix until smooth. Pour batter into a large, greased pan - the original recipe calls for 13x9x2, but I used a smaller, round pan. Bake at 350 degrees for 35 minutes or until a knife stuck through the middle comes out clean.
  • Recipe adapted from Paula Deen's Creme De Menthe Brownies on FoodNetwork.com.
https://www.cookingcatastrophe.com/peppermint-brownies/

Brownies!
I baked these in a round pan that was 9.5″ in diameter, which took about half the batter; I put the rest in cupcake liners as an experiment. The brownie “Cupcakes” came out a little burnt around the edges, so I wouldn’t make them again, but the “Big” brownie was delicious. The edges on the big brownie got a little burnt, so I just cut them off and it was fine; the rest of it was so, so soft and lovely. The reason I’d wanted to use a circular pan was because I thought it would be fun to use the icing to make a spiderweb pattern, but since I put the icing on while the brownies were still warm, it ran too much. I knew that was going to happen, but I was running out of daylight to take pictures and figured I’d give it a try to see if I could be fast enough to make the pattern before it melted. The answer, as you can see, is no. 😉

Brownies
Basic Icing

Ingredients

  • 1/2 cup powdered sugar
  • 3 tsp. water

Instructions

  • Add water to sugar and mix until a smooth, runny texture is achieved. This recipe is from my mother's vintage Betty Crocker Cookbook - the original calls for 2 cups of sugar and more water, but I simply scaled it down since I didn't need that much.
https://www.cookingcatastrophe.com/peppermint-brownies/

What is your favorite brownie recipe?

Halloween Cocktails

Halloween Cocktails

Complimentary spirits were provided for my Halloween cocktails. The alcohol kind, not the ghostly kind. 😉

As you can see, I’ve been very busy today with my Halloween cocktails! I had a sudden burst of inspiration recently and scribbled down a bunch of ideas for fun, spooky drinks I could create. I absolutely love making fun food and drinks for Halloween – there’s something about it that really brings out my elaborate, ambitious side. I’m sure my neighbors wondered why I spent an hour in the driveway photographing candy corn this afternoon! 😉

Since I created several different drinks and shots, I decided to split all the recipes into separate posts so that you wouldn’t have to scroll through one endless post. For ease of reference, I’m assembling them all here so that you can easily refer back to all the spooktacular sips:

Halloween Cocktails

Halloween Cocktails Closeup

Monster Absinthe Cocktail

Monster Cocktail

Lucid Absinthe was provided for this creepy cocktail!

When it comes to spooky cocktails, it doesn’t get much more goth than absinthe. So I was pleased to get a bottle of Lucid Absinthe in the mail, because I’d been inspired by the myriad macabre pudding cups all over Pinterest to create a grown-up version.

Lucid Absinthe

Lucid Absinthe is especially perfect for Halloween because of the black bottle with big green eyes. This is the second time in my life that I’ve had absinthe – the first was when Jai and I had a flight layover in Amsterdam for a few hours in 2009 and I bought a small bottle of “Van Gogh Absinthe” as a souvenir.

Monsters

This is a very simple cocktail to make, so it’d be perfect for a Halloween party if you’re looking for something a little simpler than, say, candy corn shots. First, you’ll want to get a set of clear plastic cups and a Sharpie. Draw whatever creepy faces you want on the front of the cup, then grab a bowl and pour in a small quantity of lemon juice – just enough to dip the top of the cup in. Then, you’ll want to add sugar to another small bowl, squeeze in a few drops of green food coloring and stir with a spoon to create neon green sugar. Dip your glass straight from the lemon juice to the sugar to create a fun green rim.

To create the drink itself, I just followed the instructions on Lucid Absinthe’s website for the traditional preparation: Add 1.5 oz of absinthe to your cup, then hold a slotted spoon over it – I didn’t rest the spoon on the cup as you normally do because it would have taken off the sugar coating – and add a cube of sugar to the spoon, if desired. Then pour cold water over the sugar to dissolve and fill the remainder of the cup. Done!

Absinthe Cocktail

Recipe: Berry Goth Orange & Blackberry Cocktail

Berry Goth Orange And Blackberry Cocktail

Vodka for this blackberry cocktail provided by Sobieski.

I hosted a bachelorette party in August, and one of the things the guests seemed to really enjoy were all the cocktails I prepared. I was inspired by the combination of real fruit and vodka in those recipes, and decided to make my own creation along these lines with a special Halloween twist.

Berry Goth Orange & Blackberry Cocktail

Berry Goth Orange & Blackberry Cocktail

Ingredients

  • 5 blackberries
  • 2 oz Sobieski Orange Vodka
  • 2 oz Sparkling Raspberry-Blackberry Water (I used Refreshe brand)
  • Ice
  • Sugar
  • Lemon Juice
  • Red & Yellow Food Coloring

Instructions

  • Add sugar to a small bowl and mix in 2 drops of red coloring and 3 drops of yellow food coloring to create an orange tint. In a separate bowl, pour in a small amount of lemon juice to dunk the edge of your glass in. Transfer the glass to the sugar bowl immediately and gently twist the rim around the sugar to coat the edge; set aside.
  • Place blackberries in a cocktail shaker and press them down with a fork to create a loose pulp. (You don't want to crush them completely - just break them up a little bit.) Add ice, vodka, and sparkling water; shake, pour into sugar coated glass and enjoy!
https://www.cookingcatastrophe.com/berry-goth-blackberry-cocktail/

The idea for this came from the myriad raspberry cocktails I’ve been making – since blackberries are plentiful around here, I wanted to create a good blackberry cocktail, and I thought orange vodka would be a good pairing for a Halloween drink! I picked up the trick for smashing the berries from the Raspberry-Meyer Lemonade with Tequila recipe that was such a hit at the party. I figure that by crushing the berries a little bit, you’ll get a darker color in your drink for full goth effect.

To top it all off, I served this in my “Gothtini” glasses with skull martini shaker. I bought this set years ago and it’s been a favorite to pull out every Halloween!

Gothtini
Cocktail Closeup

Halloween Pudding Shots: How-To

Halloween Pudding Shots
Sobieski Vodka provided complimentary spirits for me to create my Halloween pudding shots.

I love Halloween, and I’m well known for my epic parties and spooky food. From rat-shaped meatloaf to cheeseball bats, I’ve whipped up all kinds of creations over the years! I’ve been having a lot of fun making specialty drinks recently, so I sat down and brainstormed some ideas for Halloween cocktails. As I mulled over ideas, I had a sudden flash of inspiration: Candy Corn Pudding Shots! I’ve been wanting to try my hand at pudding shots for a while, and I had a vision of layering puddings in a clear cup to create a candy corn effect. Here’s what I ended up with!

Candy Corn Pudding Shots

Candy Corn Pudding Shots

Ingredients

  • Vanilla Pudding:
  • 1 box Vanilla Jell-O Pudding
  • 3/4 C Milk
  • 3/4 C Sobieski Vanilla Vodka
  • 8 oz tub of creamy whipped topping
  • Combine milk with pudding mix in a large bowl, stir thoroughly, then pour in vodka and whipped topping; this will be easier if the whipped topping is thawed. Stir until you reach a smooth consistency.
  • Orange & Butterscotch Pudding:
  • 1 box Butterscotch Jell-O Pudding
  • 3/4 C Milk
  • 3/4 C Sobieski Orange Vodka
  • 8 oz tub of creamy whipped topping
  • 4 drops red food coloring
  • 9 drops yellow food coloring
  • Mix using the same procedure outlined for the vanilla pudding, stirring in food coloring at the end to enhance the orange appearance.
  • Adapted from this recipe by Nonnie4Two on Food.com

Instructions

  • Using clear, mini plastic snack cups, spoon in a very thin layer of the vanilla pudding, followed by a layer of orange pudding. Top with a thick layer of vanilla pudding to create the three-tier "Candy Corn" effect. The pudding rises as you add each layer, so the bottom vanilla layer should be the thinnest, followed by slightly more orange pudding and one final, generous layer of vanilla.
  • Once complete, store shots in fridge or freezer. Storing in the fridge will make a rich, creamy pudding, while storing in the fridge will create an ice cream-like consistency.
https://www.cookingcatastrophe.com/halloween-pudding-shots/

Candy Corn Shots
These are delicious! Unlike standard Jell-O shots, you’ll want to eat these with a spoon. Different pudding shot recipes recommend different things for storage – some say fridge and some say freezer, so I tried it both ways. When the shots are frozen, they become almost like an ice cream – I think this is my favorite way to eat them. It seemed to me that the alcohol flavor was less sharp when eating the frozen shot, although my taste buds may have been numbed from taste-testing a refrigerated shot first. 😉

In all, I was pretty happy with how these turned out. The middle layer didn’t turn out orange enough for my liking – I used butterscotch pudding only because it was the most “Orange” pudding I could find. I wonder if pudding shots could be mixed with standard Jell-O shots? If so, a straight-up Orange Jell-O would probably look better. This was my first attempt at making these, so it was an experiment as it so often is here at the Cooking Catastrophe kitchen!

Be warned, these are a little time-consuming to layer and require possibly more patience than I have. Because the technique is clearer to illustrate visually than to write, I shot a quick and dirty video while I was making these. This was totally unscripted as I had no plans of v-logging, as you can tell by my messy hair and kitchen! I’m not trying to compete with the Food Network here – think of it as hanging out in the kitchen with a friend while they show you a shortcut:

Candy Corn Shot
Since this recipe uses more vanilla pudding than the butterscotch, I found myself with a surplus of orange-tinted pudding shots. So I got a little bonus “Recipe” out of it:

Pumpkin Face Pudding Shots!
Taking inspiration from these Frankenstein pudding cups, I drew pumpkin faces on the front of the snack cups, and poured the remainder of the butterscotch pudding in them. Remember, I was just using up a surplus of pudding from the first recipe, so these don’t taste like pumpkin – they’re just decorated to look like pumpkins. The first comment in the pudding shot recipe I adapted mentions pumpkin pie shots, so you could easily adapt this idea for pumpkin-flavored, pumpkin-face shots – which is way easier than the candy corn shots and looks just as cute, so this may have been the winning idea from today’s test kitchen!

Orange Pumpkin Shot
Have you ever made pudding shots?

Egg Salad Recipe + Hemp Hearts Giveaway!

Egg Salad Recipe

Samples were provided for review.

Since FitBloggin’, I’ve been putting hemp hearts on everything. Salads, pudding, stir-frys – anything that seems like it could benefit from a handful of these! Manitoba Harvest sent along an 8 ounce bag of their Hemp Hearts so that I could try my hand at another dish, and I wanted to share this egg salad recipe that I came up with:

Egg Salad Recipe

Egg Salad Recipe

Ingredients

  • 4 hardboiled eggs, peeled
  • 2 TBSP Ruffles Ultimate Smokehouse Bacon Dip
  • 1 TBSP Manitoba Harvest Hemp Hearts
  • 1 TBSP Honey Mustard
  • 2 TBSP finely chopped red onion

Instructions

  • Combine all ingredients in a medium bowl, smashing the eggs with a fork until thoroughly mixed. Makes two large sandwiches. Best enjoyed on a loaf of Super Fast & Tasty Homemade Bread!
https://www.cookingcatastrophe.com/egg-salad-recipe/

Win! Win! Win!

Would you like to try out my egg salad? Well, you’re in luck, because one Cooking Catastrophe reader will win an 8 oz bag of Manitoba Harvest’s Hemp Hearts to try out for themselves! To enter, just use the Rafflecopter widget below, which also contains the full official rules. Giveaway is open to residents of the US & Canada, 18+, and ends October 8th, 2013 at 11:00 PM PST.

a Rafflecopter giveaway

Easy Summer Meals: Chicken Avocado Salad

Chicken Avocado Salad
Finding truly easy recipes can be more challenging that I’d expect. Sometimes, I’ll be reading a “Quick and simple” recipe that cheerfully informs me that it has only an hour and a half of prep time. Which is great, but I’ll be sitting there thinking, “I haven’t even had time to shower today, and you want me to spend half an hour chopping asparagus?” So, I thought it would be only appropriate to share some of my “No-brainer” recipes on here. When I say quick…I mean really quick!

The chicken avocado salad which I’m about to share with you is great because it’s simple, full of veggies, and ideal for hot summer days when you really don’t want to turn on the oven. I will also be sharing hints on how to make a big batch ahead of time so that you’ve got salad ready to go all week – summer always seems to be crazy, so if you’re looking for a quick option to serve your family on hectic evening that doesn’t involve a trip through the drive-thru, this might help.

Chicken Avocado Salad

Ingredients

  • 1 package of boneless, skinless chicken breasts, boiled
  • 1 head of lettuce
  • 1 jalapeño
  • 1 red onion
  • 1 avocado
  • 1 package of grape tomatoes
  • 1 packet of hemp seeds
  • Salad dressing

Instructions

  • Chop lettuce head and add finely chopped jalapeño and red onion to taste. Top with chunks of avocado, grape tomatoes, and chopped chicken. Finish with a sprinkling of hemp seeds and your favorite salad dressing.
https://www.cookingcatastrophe.com/chicken-avocado-salad/

How to Make This Salad in Bulk & Save Time

As I mentioned above, I make a big batch of this salad all at once so that Jai and I have an easy meal we can grab all week. Here’s how I keep the salad fresh while cutting down on prep time:

Make-ahead salad
Chop 1 head of lettuce with thinly sliced red onion and finely copped Jalapeño. Store in a stockpot and you’ll have fresh, pre-made salad all week.

Preparing avocado
Chop your avocado in half and pre-slice the fruit so it is ready to scoop out; place the halves on top of one another and store in a Ziploc bag.

Boiled chicken breasts
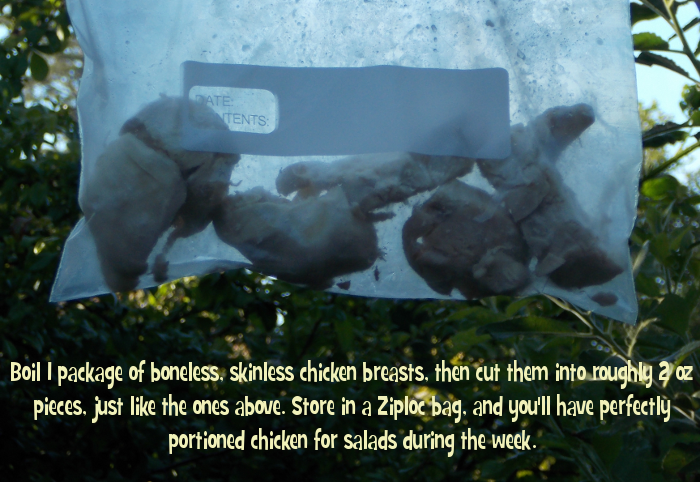
Boil 1 package of boneless, skinless chicken breasts, then cut them into roughly 2 oz pieces, just like the ones above. Store in a Ziploc bag, and you’ll have perfectly portioned chicken for salads during the week.

When you’re ready to eat, just grab your stockpot full of salad and dish up a plate. Top it with one of your chicken portions – you can tear or chop it up on your plate – then add avocado and a few grape tomatoes; I store a container of pre-washed tomatoes in my fridge so they’re all ready to go. Top it off with a sprinkling of hemp seeds and dressing. Done!

Nutrisystem-Friendly: This salad is great if you’re following the Nutrisystem program – I chop each chicken breast into 2 oz pieces since that’s equal to one PowerFuel on the plan. Then I can just grab one out of the bag and know that it’s already been weighed and is ready to go. 1 tablespoon of both avocado and salad dressing count as a limited “Extra”; I’m not sure about the hemp seeds, but I personally treat them as an extra just like sesame seeds – you could easily omit them, however. I’d highly recommend trying this salad with your lunch, especially if you’re just starting Nutrisystem, since it’s so tasty and you can really bulk it up with veggies to fill yourself up.

So there you have it: One of my go-to, easy summer meals. What simple recipes do you like to make during this time of year?