My Appearance on Simple Kitchen With Missy Maki

KPAM AM 860

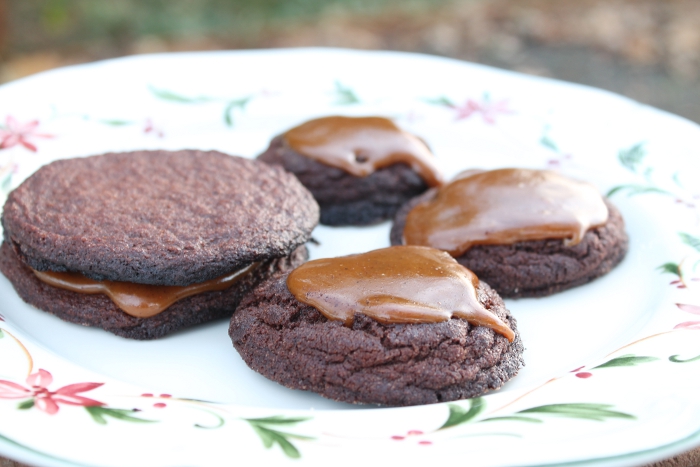
This morning, I had the pleasure of appearing on Portland radio station KPAM AM 860 as a guest of Simple Kitchen with Missy Maki. Missy is a local food blogger who talks about everything food on Sunday mornings. This year, Simple Kitchen hosted its first-ever Holiday Cookie Bake-Off, asking listeners to send in their recipes for a chance to win a gift basket with prizes including goodies from Tillamook Butter, LaGrima Vanilla, Wild Friends Peanut Butter and Bee Local. Out of the hundreds of recipes submitted, they chose a handful of favorites to be baked and brought into the station, enlisting a group of area bloggers to serve as both bakers and judges. I was assigned Chocolate Spice Crackle Cookies with Gingerbread Caramel and whipped up a fresh batch last night to share with everyone at the studio. I couldn’t wait to see what the other entries were!


Bake-Off Cookies

Cookies at the radio station

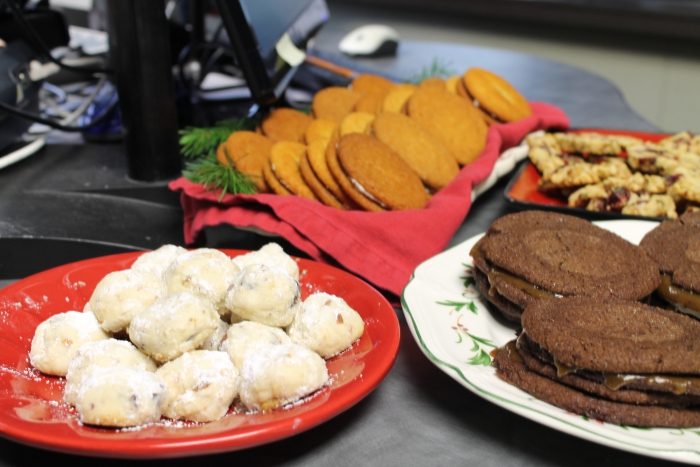
There we so many treats to taste, from yummy Pistachio Cranberry Christmas Crisps made by Marisa to Rebekah’s tasty White Chocolate Cherry Almond Teacakes, which was eventually crowned the winner by our votes. But the prize for “Most original/insane” cookie has to go to Brandie, who was assigned the task of making a cookie using pine needles and Parmesan cheese as ingredients. You know, like pine needles from a tree? Brandie actually had to get a trimming from a pine tree and told of her adventures trying to chop up pine needles in a food processor. (Spoiler alert: It doesn’t work.) She did an awesome job baking such an unusual cookie!

Beeb on the radio

I was the first guest on air, and I discussed the process of making my assigned cookie and what I thought of it. This is the first time I’ve been on the radio – unless you count the time I called into a local station in the 1990s and won a Flintstone VHS tape for answering a trivia question, but I’ve never been a real guest before. 😉 You can listen to the full show online at the KPAM website:

Hour 1 of Simple Kitchen With Missy Maki: Holiday Cookie Bake-Off – my segment begins at the 12 minute mark.

Hour 2 of Simple Kitchen With Missy Maki: Holiday Cookie Bake-Off

This was a very fun experience and I’m so glad I had a chance to take part with these lovely bloggers and DJs!

Delicious Dinners From Lee Kum Kee

Lee Kum Kee

Samples provided for review.

I love making one-dish meals, so I was happy to receive a package full of Lee Kum Kee Ready Sauces to try out. The basic idea is that you add meat to one frying pan, toss in veggies and sauce, and voilà! Dinner is served. I tested out the full line of flavors, and had tasty dinners all week.

We tried Kung Pao Chicken:

Lee Kum Kee Kung Pao Chicken

Kung Pao Chicken

Broccoli Beef:

Broccoli Beef

Orange Chicken:

Orange Chicken

Mongolian Beef:

Mongolian Beef

And Lettuce Wraps:

Lee Kum Kee Lettuce Wraps

Lettuce Wrap

Every single one of these meals was delicious. The package advises that you serve these on rice or noodles, but because we’re trying to cut down on unnecessary carb overload, we just had the dinners by themselves and it was perfect. Because we ate them alone, it served perhaps a little less than the 4-6 servings listed on the package – Jai and I each had a plate for dinner, and usually had leftovers for lunch the next day, but not with every single one. I admit that my serving size could have been a little smaller on a few of these occasions, which is what I got for skipping breakfast. 😉

Look for Lee Kum Lee Ready Sauce in a grocer near you, and be sure to check them out on Facebook, Twitter, Pinterest and YouTube!

Chocolate Spice Crackle Cookies with Gingerbread Caramel

Chocolate Spice Crackle Cookies with Gingerbread Caramel
On Sunday morning, I will be appearing on Simple Kitchen with Missy Maki on AM 860 KPAM with a group of local food bloggers to participate in a fun cookie bake-off contest sponsored by Tillamook Butter, LaGrima Vanilla, Wild Friends Peanut Butter and Bee Local. Each of us have been assigned a special cookie recipe to bake and bring to the studio – I was assigned this delicious Chocolate Spice Crackle Cookies with Gingerbread Caramel, and I baked my first batch this afternoon. They turned out great and I plan on taking them to our family’s Thanksgiving celebration tomorrow!

Chocolate Spice Crackle Cookies with Gingerbread Caramel

Chocolate Spice Crackle Cookies with Gingerbread Caramel

Ingredients

  • 1 3/4 cup flour
  • 1/2 cup unsweetened cocoa powder
  • 1/4 teaspoon baking powder
  • 1 teaspoon baking soda
  • 1/2 teaspoon salt
  • 1 teaspoon ground ginger
  • 3/4 teaspoon cloves
  • 3/4 teaspoon nutmeg
  • 1 teaspoon cinnamon
  • 1/2 cup Tillamook Butter, softened
  • 1/2 cup shortening
  • 3/4 cup brown sugar
  • 1/2 cup white granulated sugar
  • 1/4 cup molasses
  • 1 egg plus 1 egg white
  • 2 teaspoon pure LaGrima Vanilla extract
  • 2/3 cup sugar
  • 1 tablespoon cinnamon
  • 1 tablespoon cocoa

Instructions

  • 1. In a medium bowl, combine flour, 1/2 cup cocoa, baking powder, baking soda, salt, ginger, cloves, nutmeg, and 1 teaspoon cinnamon.
  • 2. In a stand mixer, beat butter and shortening until smooth. Add brown sugar and 1/2 cup granulated sugar. Whip until smooth and fluffy. Stir in molasses and the eggs and vanilla.
  • 3. Slowly stir in the dry ingredients. Blend until smooth.
  • 4. Refrigerate dough for 1 to 2 hours
  • 5. Preheat oven to 375F. In a medium bowl, stir together 2/3 cup sugar, 1 tablespoon cinnamon and 1 tablespoon cocoa.
  • 6. Form dough into small balls (the size of one tablespoon) or large balls (the size of 2 1/2 or 3 tablespoons). Roll in sugar mixture.
  • 7. Place balls on a greased cookie sheet. If you would like crispy ginger snap like cookies, flatten the balls with a sugared glass until thin, about 1/4 inch thick. If you would like chewy and soft spice cookies, leave as balls and do not flatten.
  • 8. Bake small cookies for 9-12 minutes and large cookies for 15 to 20 minutes, depending on how chewy or crispy you want them. Let cool on baking sheet 3 to 5 minutes and then cool on a rack.
  • 9. Meanwhile, make the gingerbread caramel filling. Use this as an icing topping or as a filling sandwiched between two cookies: For the gingerbread caramel filling, heat the following ingredients over medium heat until bubbling: 2 Tablespoons butter, tiny dash of salt, 2 Tablespoons molasses, 8 Tablespoons sugar, 6 Tablespoons half and half. Cook for 6 to 9 minutes until caramel is thickened, keep in mind it will thicken a bit when it cools. Remove from heat and stir in 1/4 teaspoon vanilla extract, 1/4 teaspoon cinnamon, 1/4 teaspoon ground ginger, 1/8 teaspoon allspice, 1/8 teaspoon nutmeg, 1/8 teaspoon ground cloves. Allow it to cool. Sandwich caramel between two cookies or spread over a cookie as a topping. Eat up!
https://www.cookingcatastrophe.com/chocolate-spice-crackle-cookies-with-gingerbread-caramel/

Plate of chocolate gingerbread & caramel cookies

Portlanders: Tune into AM 850 KPAM on Sunday morning, December 1st at 10 AM to hear more about this and other delicious holiday cookies!

Chianti Challenge: Who Will Win The Taste-Off?

Chianti Challenge

Complimentary wine provided for tasting.

Last month, I came home from my trip to Chicago to find a shipment from our friends at Banfi containing 3 Chianti wines to taste and compare. A tough job, to be sure! 😉 After some thorough research, here are my thoughts.

I don’t know why, but this bottle was almost impossible to open. I think I must have just gotten an extra stubborn cork, because we couldn’t get this open until Jai stood at the top of the stairs holding the corkscrew while I stood at the bottom holding the bottle. After exerting massive force on both ends, we popped the cork (And also splashed a bit of wine on me). Remember, this was before we’d had anything to drink. 😉

The wine itself was great – dry but smooth, perfect for a night in relaxing (cork issues aside ;)). Banfi advises that this wine pairs nicely with rich pastas, steaks, and aged cheese; or, if you’re me, leftover takeout and Halloween candy. And yes, that IS a plastic glass that I drank this out of while munching on bite-sized Snickers. I won’t win any wine connoisseur points here, but don’t tell me you haven’t had a long day like this! In fact, every time I watch The Voice, I see a commercial with a lady sitting in her PJs eating chips and drinking wine while she sits in front of her laptop. Now that’s the life!

This bottle was a little less difficult to open, although it still took two of us. This was very smooth and tasty – I think this might be the overall winner for me.

This was the easiest one to open – I didn’t have to enlist any help. This wine was very dry – tart, almost a little bitter. They recommend this as a pairing for flavorful pastas – I served this with spicy chicken and vegetables served over noodles, and it was a fabulous match.

Quick Lunchtime Solutions From Tai Pei

Tai Pei

This post about lunchtime solutions is sponsored by SocialMoms and Tai Pei. Quick meals have always been a point of major interest to me, and it’s even more crucial now that Jai and I are a few months off our diet plan. The challenge of maintaining progress for us is finding the time to prepare foods in advance that can be easily grabbed and eaten – and aren’t high in calories. It’s been a big challenge, primarily because of how chaotic the last few months have been. I knew that 2013 would be a pivotal year of changes for me, and I don’t think it’s an exaggeration to say that the last few months have been the busiest in my life. Keeping up with cooking has felt like an impossible task – I know I can’t keep this pace up, so I’m doing what I can to prioritize and figure out the most realistic way to map out my schedule going forward. In the meantime, I have a ton of work built up this week since I’ve been out of town, but fortunately I have some easy solutions from Tai Pei to get me through the last few crazy days of October!

Tai Pei make frozen entrees packaged in a cute little takeout-style box – but at around 300-400 calories per box, it is most likely a lower-calorie option than what I would order at my favorite restaurant! I received several coupons to taste-test these meals, and there are lots of flavors to choose from – I decided on Sweet & Sour Chicken, Orange Chicken, and Chicken Fried Rice from the standard line, as well as Spicy General Tso’s Chicken from the new Tai Pei Asian Garden line, which is their new line of entrees which are lower in calories and high in fiber. Since I’ve been eating my way through Chicago the last few days, I figured I’d start by heating up this one for lunch first! 😉

Tai Pei Asian Garden

These boxes are unique in that you do not remove the plastic wrap before microwaving them. I only noticed this after I had automatically started peeling it off, but fortunately, it didn’t seem to negatively impact how my lunch cooked. All you have to do is slap the box in the microwave for 5 minutes, let it sit for 3, and then eat. You don’t even need a plate, although I used one for this photo just because that’s what us food bloggers do:

Spicy General Tso's Chicken

Normally, you’d just eat these right out of the cardboard container; can you say “Perfect” for overloaded days?! No cooking, no cleaning! There is “Good Fortune in Every Box”, including a scannable QR code fortune cookie on the side – cute! I thought this made for a tasty and filling lunch. When they say “Spicy”, they really mean it – I was guzzling water all through my lunch, which is good, because I need to drink more water! 😉 This was such an easy solution and I’m so happy to have a few more boxes in the freezer to get me through the rest of this hectic week!

Want to save some cash as well as time? Click here to print off a “Buy One, Get One Free” coupon for any Tai Pei entree or appetizer! And be sure to “Like” Tai Pei on Facebook for more info:

This blog post is part of a paid SocialMoms and Tai Pei® blogging program. The opinions and ideas expressed here are my own.

Fruitcake Stuffing. That’s Right, Fruitcake Stuffing.

Fruitcake Stuffing

Travel, accommodation and insane fruitcake challenge provided by Kenmore!

You guys know that I’m an experimental cook. However, I’m not good at cooking (Or thinking) under pressure. So when I was at the Kenmore Blogger Summit in Chicago this weekend, I had to chuckle when they announced an “Iron Chef” style cooking competition where bloggers would be asked to create and prepare a dish in 30 minutes flat. But there’s a Cooking Catastrophe twist: The key ingredients in our dish were “Horrible Hostess Gifts” – things that everyone supposedly hates getting when they host a party, such as cheese trays, boxed wine, fruitcake and Royal Dansk butter cookies. Me? I’d love some cheap boxed wine, but I understand why most don’t! I was assigned to a team with several other bloggers, and we were dreading the fruitcake, as everyone does. I mean, what can you cook out of fruitcake? And of course, we got the fruitcake as our secret ingredient. And as an added twist, we were required to use a mystery Kenmore appliance in our meal prep – and our assigned appliance was a grill. So we had to figure out a way to incorporate both fruitcake and grills into something edible!

Master planner Kimberly had asked me what kind of savory dish could we possibly make from fruitcake. In a flash of twisted inspiration, I said, “We could use it to make stuffing,” and everyone else liked my insane idea. So off we went, grilling fruitcake to make a stuffing!

As I mentioned in my recap on MomStart, my group was the most amazing example of teamwork. Once I threw out the stuffing idea, they all ran with it and suggested genius additions, ingredients, and morphed it into a full blown Christmas dinner with a side of chicken and veggies. I couldn’t believe the creativity, quick hands, clean-up skills – yes, we were judged on that too! – and cooking mastery that came out! The team took an idea that could have been gross and created something fabulous. So fabulous, in fact, that it was actually crowned the winning dish by a panel of judges, including chef Kari Karch! I couldn’t believe it!

This is the kind of challenge that seemed custom-made to stress me out – I thought I’d be a hot mess running around in circles, and I WAS, but it was actually productive! I had so much fun and have much love for Team 2 and their incredible culinary skills!

Recipe: Peppermint Brownies

Peppermint Brownies

This post contains my Amazon Associates link.

I was in the mood for brownies last week, so I decided to make a batch using Paula Deen’s Creme De Menthe Brownies recipe. I discovered this recipe a few years back and it results in the best brownies I’ve ever made, so it’s a winner! My version adapts and replaces several of the ingredients to what I have on hand, and resulted in perfect, soft, peppermint brownies. Yum.

Peppermint Brownies

Peppermint Brownies

Ingredients

  • 1 1/4 cups all-purpose flour
  • 3/4 cup Hershey's Cocoa
  • 2 cups sugar
  • 1/2 tsp. cinnamon
  • 1/2 tsp. baking powder
  • 4 eggs
  • 1 tsp. Nielsen-Massey Madagascar Bourbon Pure Vanilla Extract
  • 2. tsp. Nielsen-Massey Pure Peppermint Extract
  • 1 cup Country Crock margarine

Instructions

  • Combine all ingredients in a large bowl and mix until smooth. Pour batter into a large, greased pan - the original recipe calls for 13x9x2, but I used a smaller, round pan. Bake at 350 degrees for 35 minutes or until a knife stuck through the middle comes out clean.
  • Recipe adapted from Paula Deen's Creme De Menthe Brownies on FoodNetwork.com.
https://www.cookingcatastrophe.com/peppermint-brownies/

Brownies!
I baked these in a round pan that was 9.5″ in diameter, which took about half the batter; I put the rest in cupcake liners as an experiment. The brownie “Cupcakes” came out a little burnt around the edges, so I wouldn’t make them again, but the “Big” brownie was delicious. The edges on the big brownie got a little burnt, so I just cut them off and it was fine; the rest of it was so, so soft and lovely. The reason I’d wanted to use a circular pan was because I thought it would be fun to use the icing to make a spiderweb pattern, but since I put the icing on while the brownies were still warm, it ran too much. I knew that was going to happen, but I was running out of daylight to take pictures and figured I’d give it a try to see if I could be fast enough to make the pattern before it melted. The answer, as you can see, is no. 😉

Brownies
Basic Icing

Ingredients

  • 1/2 cup powdered sugar
  • 3 tsp. water

Instructions

  • Add water to sugar and mix until a smooth, runny texture is achieved. This recipe is from my mother's vintage Betty Crocker Cookbook - the original calls for 2 cups of sugar and more water, but I simply scaled it down since I didn't need that much.
https://www.cookingcatastrophe.com/peppermint-brownies/

What is your favorite brownie recipe?

Upgrading My Camera: Now My Casseroles Look Like High-Definition Barf

Mmmm!

So I upgraded to a DSLR camera last week and I am SUPER excited about it! I’ve only just begun to explore all of its settings, but I’ve already been able to get some great photos with it. This is not one of them. What you are looking at it a chicken and egg scramble that I just made for lunch; I thought I would try taking some photos before I ate it, because I’d like to share more super-simple recipes on here, and I’m having fun playing with my camera. I shook my head when I saw the previews on the camera and laughed even harder when I looked at the photos full-size! It tasted good, but it sure does not look good. Between the bird hovering above and threatening to swoop down and eat the food, the hornet buzzing around me while I was operating the camera, and the gross photos, I’m tempted to label this a “Catastrophe”, but we enjoyed the meal otherwise so this would have to go under the header of “Blogger problems”.

I do well photographing sweet treats, drinks, and more “Solid” food, but I have always found casserole-type, sloppy dishes to be a challenge. I’m sure there are bloggers out there who have a whole slew of props just for making casseroles look good, so I look forward to reading up more on tips for “Challenging” food photography. (Or maybe I can just Photoshop another casserole on top of this. ;))

Halloween Cocktails

Halloween Cocktails

Complimentary spirits were provided for my Halloween cocktails. The alcohol kind, not the ghostly kind. 😉

As you can see, I’ve been very busy today with my Halloween cocktails! I had a sudden burst of inspiration recently and scribbled down a bunch of ideas for fun, spooky drinks I could create. I absolutely love making fun food and drinks for Halloween – there’s something about it that really brings out my elaborate, ambitious side. I’m sure my neighbors wondered why I spent an hour in the driveway photographing candy corn this afternoon! 😉

Since I created several different drinks and shots, I decided to split all the recipes into separate posts so that you wouldn’t have to scroll through one endless post. For ease of reference, I’m assembling them all here so that you can easily refer back to all the spooktacular sips:

Halloween Cocktails

Halloween Cocktails Closeup

Monster Absinthe Cocktail

Monster Cocktail

Lucid Absinthe was provided for this creepy cocktail!

When it comes to spooky cocktails, it doesn’t get much more goth than absinthe. So I was pleased to get a bottle of Lucid Absinthe in the mail, because I’d been inspired by the myriad macabre pudding cups all over Pinterest to create a grown-up version.

Lucid Absinthe

Lucid Absinthe is especially perfect for Halloween because of the black bottle with big green eyes. This is the second time in my life that I’ve had absinthe – the first was when Jai and I had a flight layover in Amsterdam for a few hours in 2009 and I bought a small bottle of “Van Gogh Absinthe” as a souvenir.

Monsters

This is a very simple cocktail to make, so it’d be perfect for a Halloween party if you’re looking for something a little simpler than, say, candy corn shots. First, you’ll want to get a set of clear plastic cups and a Sharpie. Draw whatever creepy faces you want on the front of the cup, then grab a bowl and pour in a small quantity of lemon juice – just enough to dip the top of the cup in. Then, you’ll want to add sugar to another small bowl, squeeze in a few drops of green food coloring and stir with a spoon to create neon green sugar. Dip your glass straight from the lemon juice to the sugar to create a fun green rim.

To create the drink itself, I just followed the instructions on Lucid Absinthe’s website for the traditional preparation: Add 1.5 oz of absinthe to your cup, then hold a slotted spoon over it – I didn’t rest the spoon on the cup as you normally do because it would have taken off the sugar coating – and add a cube of sugar to the spoon, if desired. Then pour cold water over the sugar to dissolve and fill the remainder of the cup. Done!

Absinthe Cocktail